Emacs on MacOS - Part 1 - Installation
Intro
Welcome to Part 1 of the Emacs on MacOS tutorial, this first article in the series will deal with getting Emacs installed and ready to go. As a MacOS user your in luck as emacs is already installed. Open up a terminal app and type
emacs
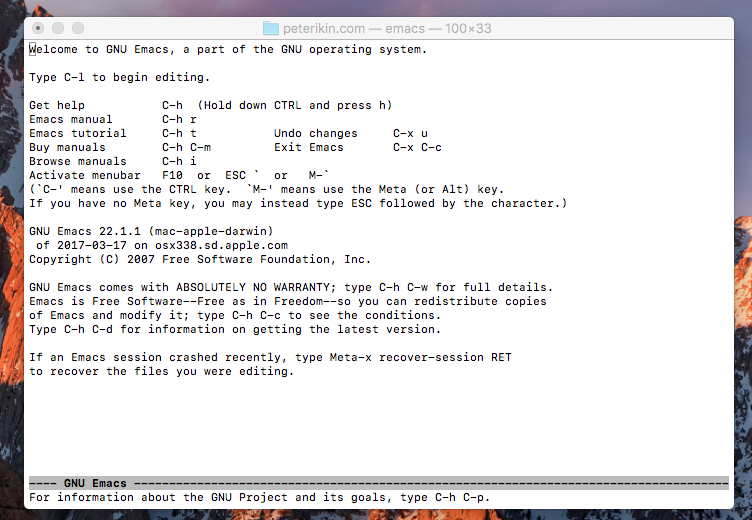
You should be greeted with the following screen

All is good, at least after a fashion. If you look at the version number it is 22.1.1 which is in fact pretty old and a lot of the neat features available in more current versions are missing. The latest version at the time of writing is 25.2.1 So what do we need to do to update our emacs version?
The best way of getting the latest version of emacs is to not update the system version of emacs at all. Instead a more up to date version is installed and all references to the old version (shortcuts, aliases etc.) are updated to point to the newly installed version. There are 2 main ways to get a more up to date version of emacs; first is the ‘app way’; second is the ‘homebrew way’
The app way
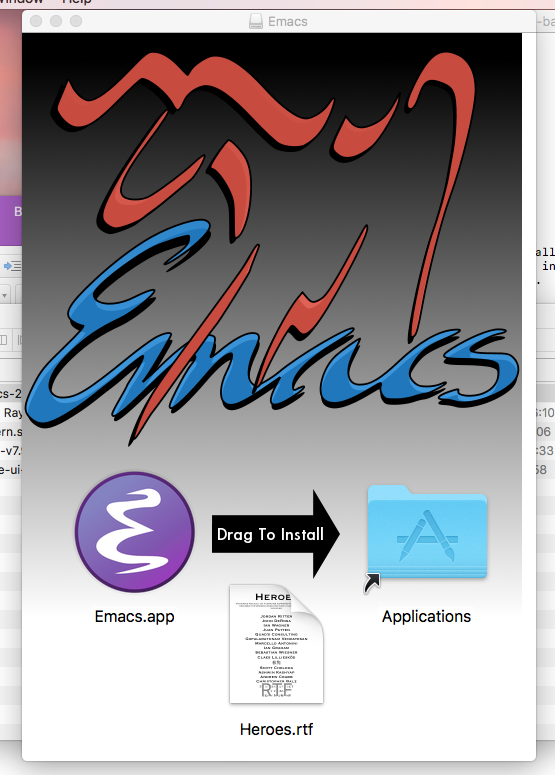
Head over to https://emacsformacosx.com in a browser of your choice and download the dmg file. Once downloaded double click the file and open it. You should be presented with a screen similar to the one below.

Follow the instructions and drag the app into the applications folder in the dialog. The emacs app will now install and show up in all
the usual places that an app would (e.g. the app launcher, applications folder etc.). As expected launching the newly installed app (e.g. from one of its icons)
will result in the latest version of the app being opened. One of the nice properties of emacs is that it can be launched ‘in line’ in a terminal.
Simply typing emacs will not work however (the old version will launch). To open the latest version the executable that was part of
the previously installed app should be invoked. To do this type the following from a terminal prompt.
/Applications/Emacs.app/Contents/MacOS/Emacs -nw
Note the -nw parameter passed to the emacs application, this tells emacs to launch in ‘no window’ mode. If this option is omitted then
the regular windowed application will open rather than the ‘in line’ terminal version. Obviously having to type out the full path to the latest emacs
app is not as convenient as just emacs. To get around this we need to add an alias into the terminal so that whenever we type emacs the
terminal app will receive /Applications/Emacs.app/Contents/MacOS/Emacs -nw instead.
To do this open the .bash_profile file located in your user’s home directory and add the following line to the end of the file
alias emacs='/Applications/Emacs.app/Contents/MacOS/Emacs -nw'
After restarting your terminal app, typing emacs should result in the correct, up to date version of emacs being launched.
The homebrew way
As an alternative to manually downloading and installing emacs you can use the Homebrew tool to install it instead. Further information on installing homebrew can be found in my previous homebrew blog post. Assuming that you have followed the the installation instructions outlined there then from a terminal window emacs can be installed with.
brew install emacs --with-cocoa
this installs the latest version of emacs (25.2) in the /usr/local/Cellar/emacs/25.2 directory. From within this directory there
is a MacOS app (Emacs.app), in addition in the bin directory there is an emacs executable that can be invoked directly from the command line by typing the following
/usr/local/Cellar/emacs/25.2/bin/emacs
As with the previous installation method executing this will start the Mac app, if you want emacs to launch in the current terminal window use the -nw option.
As before it is useful to setup an alias in your .bash_profile
alias emacs=‘/usr/local/Cellar/emacs/25.2/bin/emacs -nw’
In addition if you want to have the app show up in the launchpad, create an alias through UI by opening up a finder window and selecting go to folder and go to the folder above. Right click on the emacs.app and select make alias. Rename the alias if you wish, then move it to the applications folder.
Conclusion
Hopefully after following the instructions above you should have the latest version of emacs that can be run either as an app within its own window or ‘in line’ in the terminal app.